ethervault
EtherVault
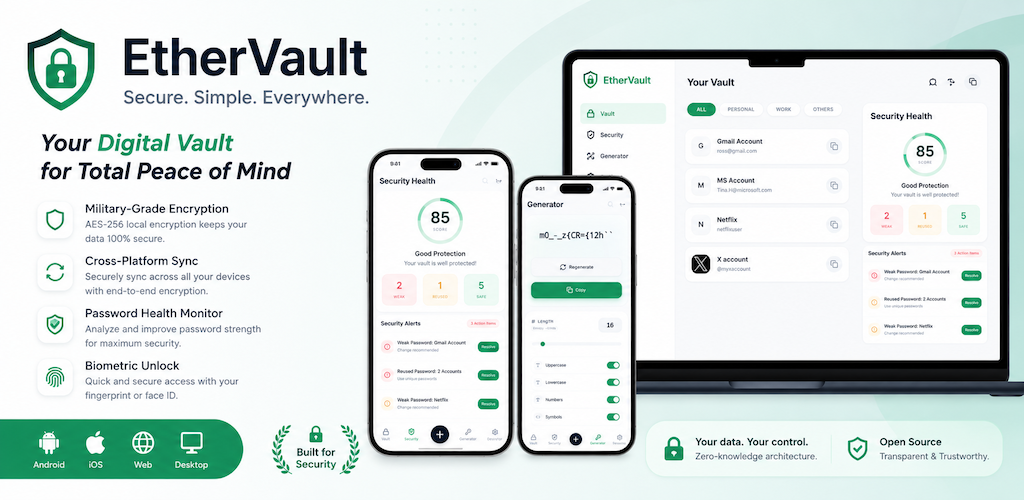
EtherVault is a modern, cross-platform password manager designed for industrial-grade security and a seamless user experience. It supportsDesktop and Mobile (Android/iOS) platforms, helping you securely store, manage, and sync your sensitive credentials.
| English | 中文 | 日本語 | 한국어 |
📖 Project Overview
EtherVault is built using a Monorepo architecture, with core business logic separated from the UI layer to ensure high code reusability and consistency across platforms. The project features built-in robust local encryption (AES-256), supports end-to-end encrypted synchronization with major cloud storage services (like Google Drive), and integrates advanced features such as biometric unlock and password health analysis. It is dedicated to creating the most secure digital vault for users.
🚀 Features
🔐 Core Vault
- Credential Management: Securely store usernames, passwords, URLs, and notes.
- Efficient Retrieval: Supports fuzzy search, category filtering (All, Personal, Work, Others), and multi-dimensional tag management.
- Smart Icons: Automatically fetches and displays website icons for a better visual experience.
🛡️ Security Dashboard
- Security Score: Real-time assessment of vault health based on password complexity algorithms.
- Risk Detection: Automatically scans for weak or reused passwords and provides optimization suggestions.
- Data Visualization: Visualizes password security distribution through intuitive charts.
🎲 Password Generator
- High Entropy: Generates strong, uncrackable passwords.
- Highly Customizable: Supports custom length (up to 128 characters) and character sets (uppercase, lowercase, numbers, symbols).
- One-Click Copy: Automatically calculates entropy and allows one-click copying after generation.
⚙️ Settings & Ecosystem
- Cloud Sync: Supports encrypted data synchronization with cloud providers like Google Drive, ensuring consistency across devices.
- Appearance: Supports Dark Mode, Light Mode, and System Default.
- Internationalization: Built-in multi-language support (English/Simplified Chinese/Japanese/Korean/Spanish/French/Portuguese/Traditional Chinese).
- Data Mobility: Supports standard CSV/JSON import and export for easy data migration.
- Security Protection: Supports Biometric Unlock (FaceID/TouchID), auto-lock, and local operation log auditing.
🛠️ Tech Stack
This project is built on a modern frontend technology stack:
- Core Language: TypeScript
- UI Framework: React 19
- Build Tool: Vite
- Styling: Tailwind CSS
- Cross-Platform Runtime:
- Desktop: Electron
- Mobile: Capacitor 8
- Animation: Framer Motion
- Charts: Recharts
- State Management: Custom Hooks & Context API
- Package Management: NPM Workspaces
💻 Development Guide
Prerequisites
- Node.js (v18 or higher recommended)
- NPM
1. Google Console Setup (For Cloud Sync)
Before running the app, you need to set up a project in Google Cloud Console to enable Google Drive synchronization:
- Go to Google Cloud Console.
- Create a new project (e.g.,
ethervault-dev). - Enable API:
- Navigate to APIs & Services > Library.
- Search for Google Drive API and enable it.
- Configure OAuth Consent Screen:
- Go to APIs & Services > OAuth consent screen.
- Select External (unless you are a G-Suite user).
- Fill in required app information.
- Add your email as a Test User.
- Create Credentials (Web Client):
- Go to APIs & Services > Credentials.
- Click Create Credentials > OAuth Client ID.
- Application type: Web application.
- Add Authorized JavaScript origins:
http://localhost:3000(andhttp://localhost:5173if needed). - Add Authorized redirect URIs:
http://localhost:3000(andhttp://localhost:5173if needed). - Copy the Client ID.
- Create Credentials (iOS Client):
- Go to APIs & Services > Credentials.
- Click Create Credentials > OAuth Client ID.
- Application type: iOS.
- Add Bundle ID:
com.ethervault.app. - Copy the Client ID.
- Configure Environment Variables:
- Create a
.envfile inpackages/app/.env(copy from.env.exampleif available). - Add your credentials:
# This is for local development
VITE_GOOGLE_CLIENT_ID=your_client_id_here
# This is for native application on iOS, Android, and Desktop
VITE_GOOGLE_CLIENT_ID_IOS=your_client_id_here
- Create a
2. Install Dependencies
Run in the project root:
npm install
3. Start Development Environment
Web Mode (Browser):
npm run dev
Desktop Mode (Electron):
npm run dev:desktop
Mobile Sync (Capacitor):
npm run mobile:sync
4. Build & Package
Build Web Assets:
npm run build
Build Desktop App:
npm run dist:desktop
Build iOS/Android:
# iOS
npm run build:ios

# Android
npm run build:android
5. Other Commands
Clean Project:
npm run clean
Type Check:
npm run type-check
📄 License
This project is licensed under the MIT License. You are free to use, modify, and distribute the code of this project unless otherwise specified.
🤝 Contribution
Contributions are welcome! If you have suggestions or find bugs, please follow these steps:
- Fork the repository.
- Create your feature branch (
git checkout -b feature/AmazingFeature). - Commit your changes (
git commit -m 'Add some AmazingFeature'). - Push to the branch (
git push origin feature/AmazingFeature). - Open a Pull Request.
EtherVault — Secure locally, Sync globally.